Visit Essex assignment
Friday, 10 December 2010
Animation of the gardens
I used a free camera and the set key function to move around the flowers. Unfortunately despite using a network render there was no time to edit the frames within Premiere pro.
Animation of seal colony at Walton cliffs
The cliffs, ocean and seals were merged into one scene. The seal was duplicated and a target camera placed on a path to go around the seals. Following feedback from the presentation I zoomed the camera in closer to the seals and sped up the timeline.
The gardens
I created a plane and used the sub object material editor to apply different materials to various sections i.e. grass, soil and a path. The individual flowers were then merged into the scene. Each flower was then duplicated using the array tool. This proved to be extremely time consuming and often too much the computer to cope with as 3D Max kept crashing. I added some omni lights to the scene and a camera. I originally placed the camera on a path constraint to go around the flower bed but the camera was either too close or too far from the flowers. I added an image (previously edited in photoshop to include the path) onto a background plane and adjusted the grass material on the ground plane accordingly. However this method of trying to blend in the ground plane with the background did not work as well as I hoped.
 |
| screenshot of garden scene |
 |
| render of garden scene |
 |
| render of garden scene |
Lily
To make this flower I used the taper modifier on a cylinder. The end caps were removed from the cylinder then the transform handle placed at the base of it with the adjust pivot only mode. Using soft selection on the top of the cylinder a taper modifier was added so that the cylinder would fan out at the top. A second taper was used on the z axis to create the lip of the flower. For the stamen a cylinder was edited then duplicated and placed inside the flower cylinder. Appropriate diffuse colours were used on the parts of the flower
 |
| screenshot of lily |
 |
| render of lily |
Daisy
A cylinder was used for the stem with the extrude tool on the top section to create a cup shape. A hemisphere was placed within this cup shape. The segments of the sphere were kept at 32. All the sphere edges were selected then extruded to give texture. For the petals I used a thin box 3 faces wide. The edge vertices were edited to create a more rounded shape. The edges running down the centre were then extruded inwards to give more definition to the shape, followed by a bend modifer. Appropriate material was added to the parts of the flower, which was then grouped together and a further bend modifier applied.
 |
| screenshot of daisy |
 |
| daisy |
 |
| close up of daisy |
Rose
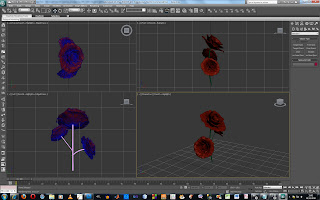
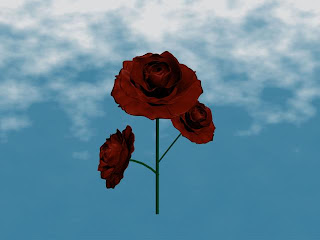
To make the rose I drew out the shape of one side of a rose using the create line tool, with 5 vertices. A lathe modifier was added to fill out the shape of the petals on that side. This was then copied and rotated around a central point moving about an eighth of the way each time, until the circle was completed.
A cylinder was added for the stem. The rose head and the stem were grouped together, copied twice and positioned to make a rose bush.
A cylinder was added for the stem. The rose head and the stem were grouped together, copied twice and positioned to make a rose bush.
 |
| screenshot of rose |
 |
| rose render |
The gardens
To make the gardens I decided to model 3 different types of flower:
- Rose
- Daisy
- Iris
Subscribe to:
Comments (Atom)